Deploying AWS Greengrass on VMware vSphere
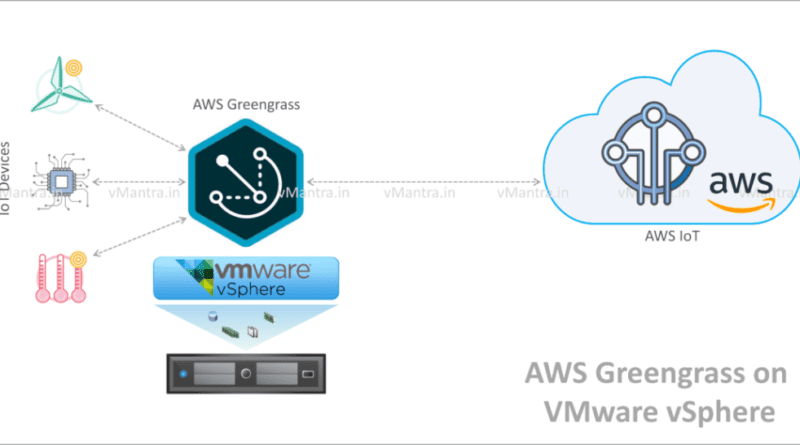
AWS Greengrass on VMware vSphere:
VMware has recently launched AWS Greengrass on VMware vSphere appliance in a preview 0.5 and entered in Edge Computing market. But what AWS Greengrass is? So First thing first, AWS Greengrass is a software from Amazon Web Services that extends AWS cloud capabilities to locally installed IoT devices. With this capability, Internet of Things (IoT) devices can execute and analyze their collected data locally while still taking advantage of the AWS cloud.
It is important to realize that processing Data Analytics, Serverless Computing (AWS Lambda functions), and Machine Learning on the device’s local network make the communication more secure than processing on the private cloud. Also, latency sensitive applications can perform better in this type of environment.
Deployment Requirements:
AWS GreenGrass on VMware vSphere appliance is based on Ubuntu 16.04.3 LTS. Please see the below requirements to deploy this appliance:
| CPU | 1 |
| Memory | 512 MB |
| Storage | 500 GB |
| Network | 1 NIC |
| Supported Hypervisor | ESXi 6.5 U1, 6.5, 6.0 U3, or 6.0U2 |
| Workstation 14.0, 12.5, or 12.0 | |
| Fusion 10.0, 8.5, or 8.0 |
The preview 0.5 of this appliance is available at VMware Marketplace. if you are interested to deploy you can download it from here.
How to Deploy Appliance on ESXi:
- Login to VMware ESXi
- Go to Virtual Machines >> Click on “Create / Register VM“
It will open New Virtual Machine creation wizard.
3. Select “Deploy a virtual machine from an OVF or OVA file“, click Next
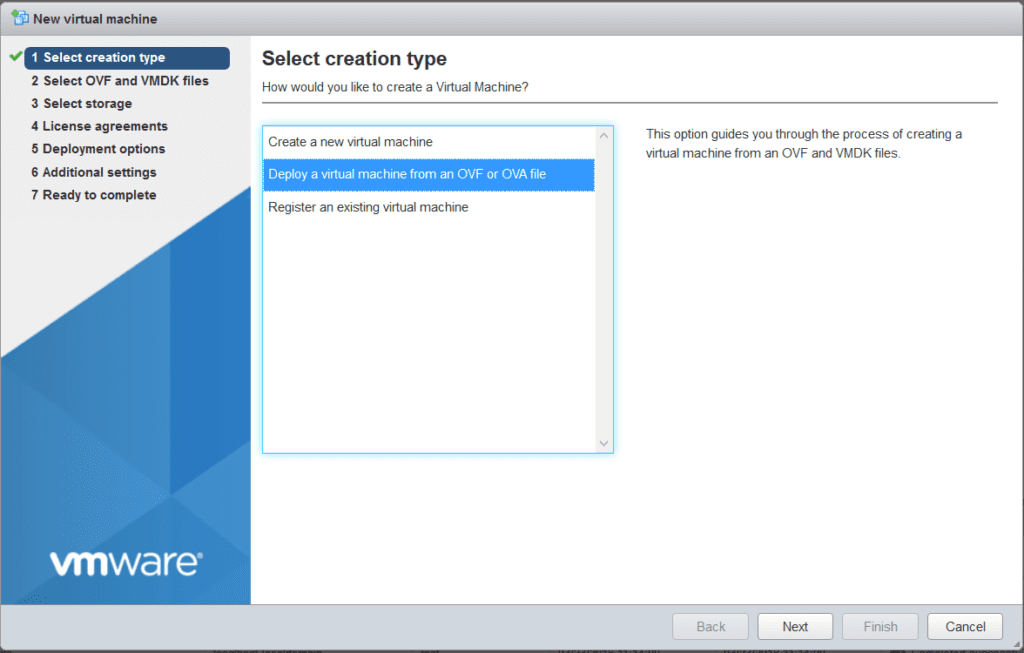
4. Next page is about Select OVF and VMDK files, Enter a name for the virtual machine (it’s not the hostname and can be changed later)
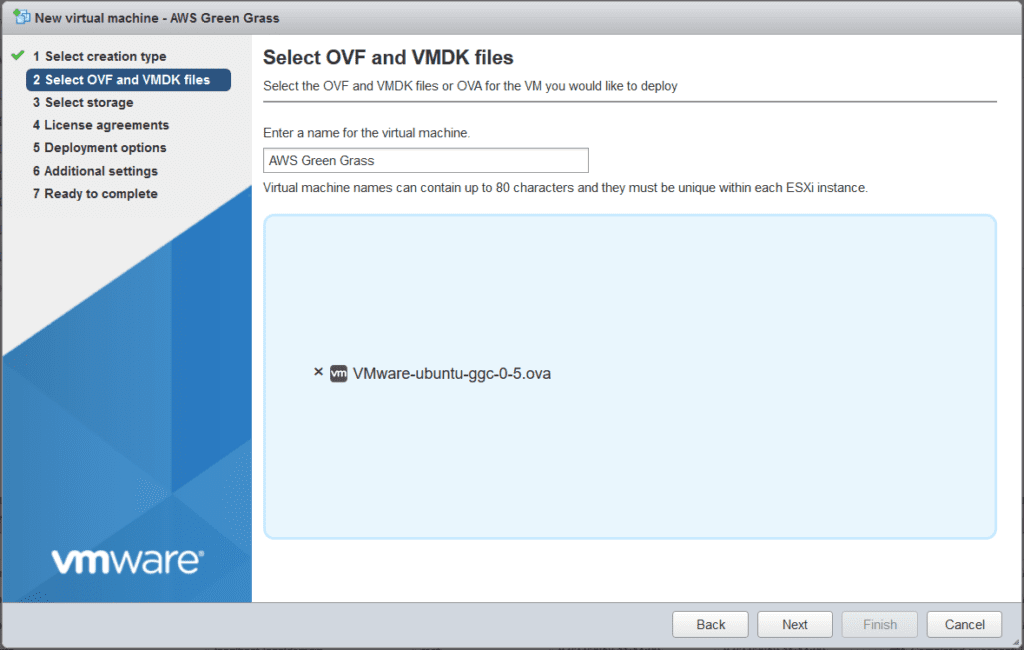
Click on the rectangular area to select browse AWS Greengrass ova file location, click Next
5. On the next page, Select the Datastore in which you want to store this AWS Greengrass VM, click Next
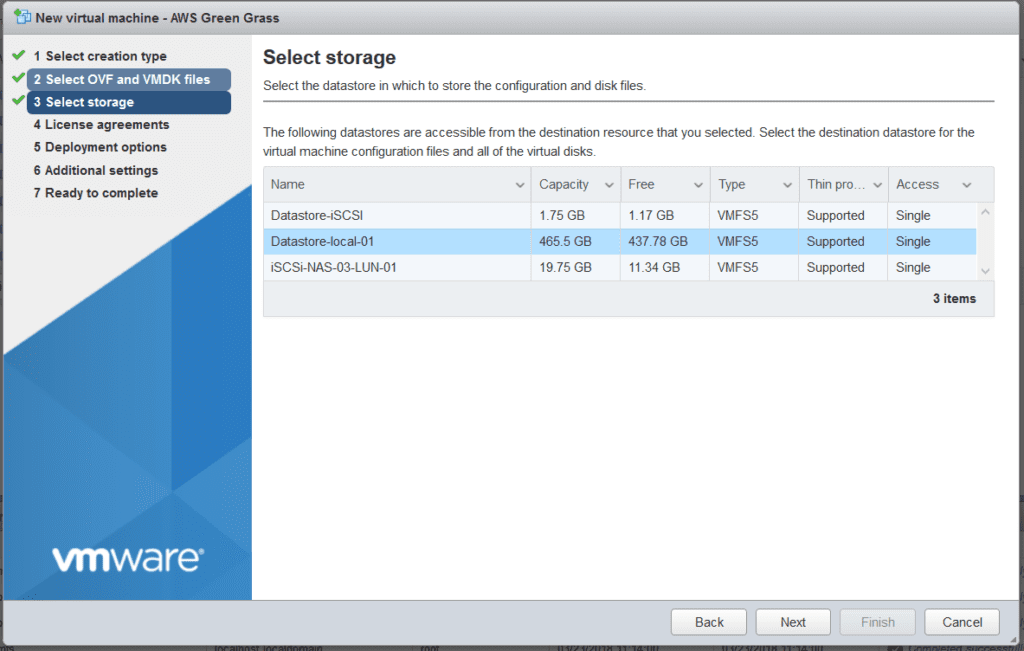
6. On Deployment options page, select Network to be assigned to the GG VM
Disk provisioning has two options, if you are deploying in Lab environment you can use Thin (default) otherwise select Thick.
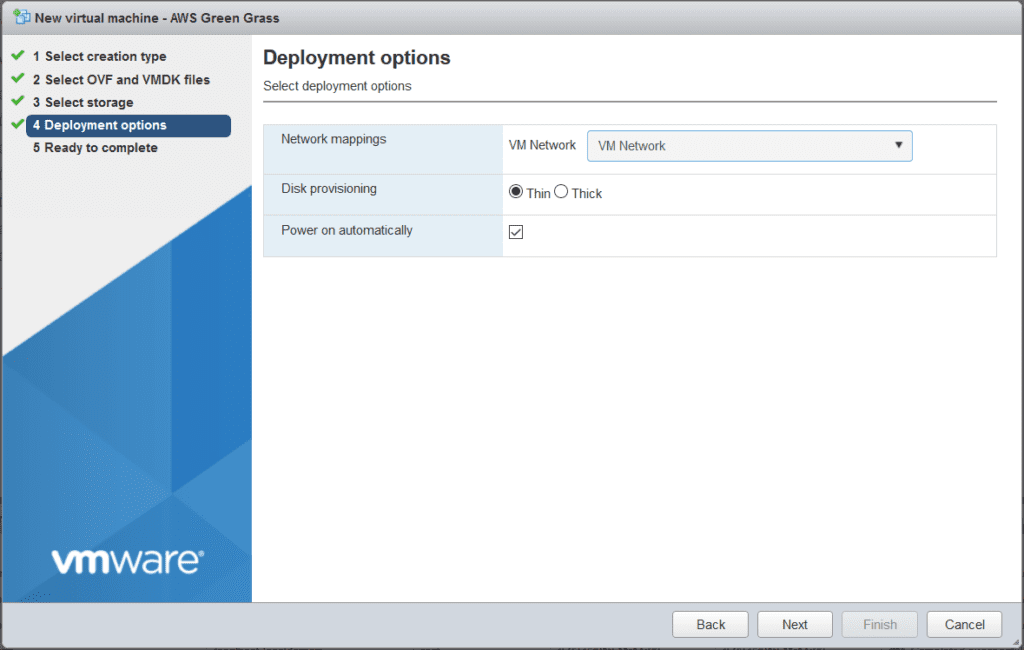
Check on Power on automatically checkbox, it will power on VM automatically just after installation. click Next
7. Review the summary on the Ready to complete page. click Finish to begin AWS GG virtual machine installation.
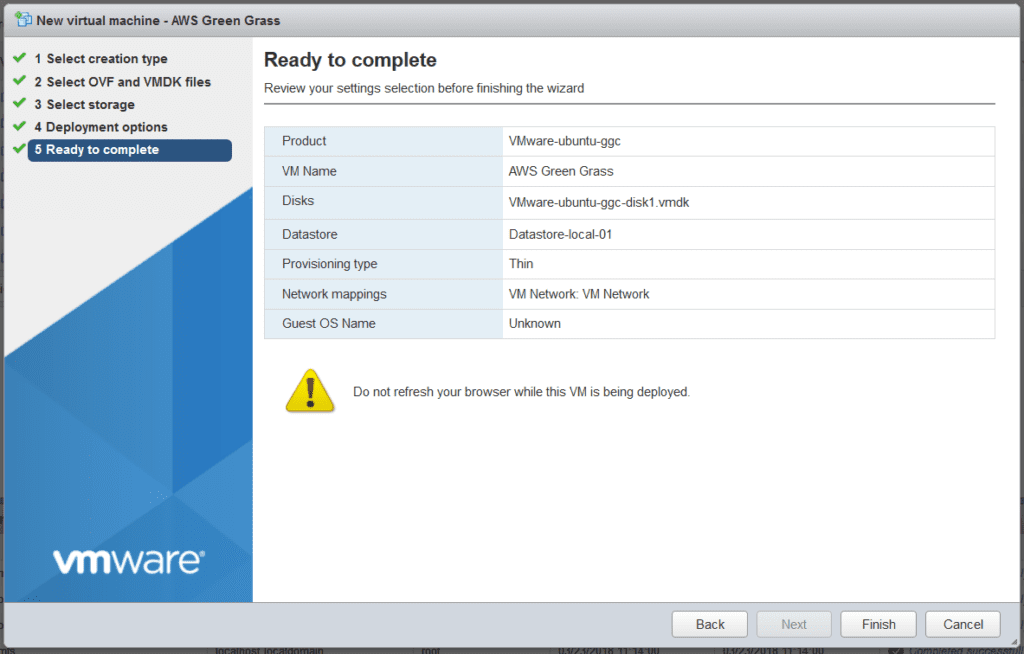
At this instant, You can check the installation progress in Recent Tasks. When the installation completes, you will get a completion message on the top bar.
After installation VM will take some time to power on.
Select the VM and take the console
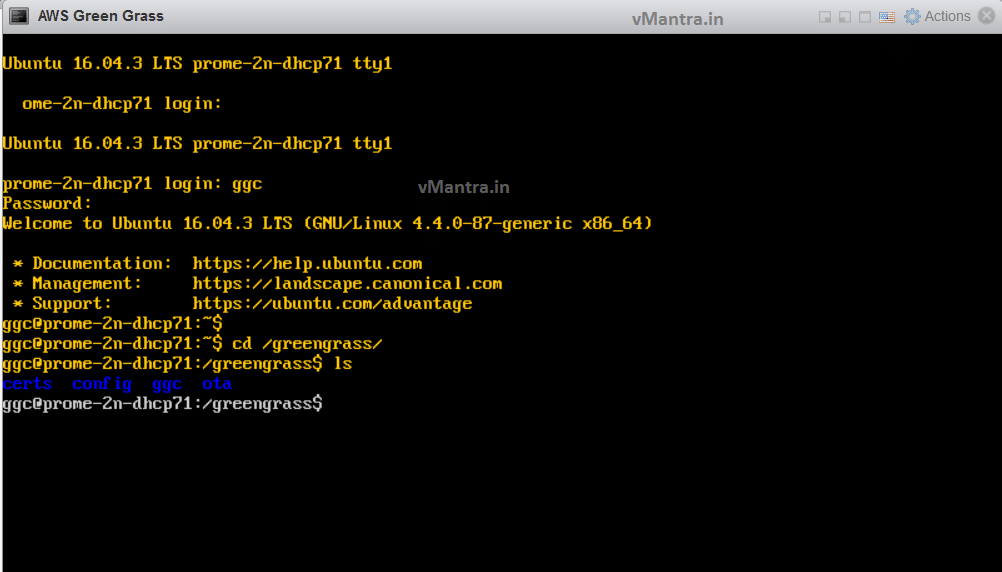
Now you will see the AWS Greengrass Appliance login screen, use default login id: ggc and default password: ggc to login.
Of course, You should change the password as soon as possible using the passwd command.
Next Step
As shown above, your first AWS Greengrass on VMware vSphere VM is ready now. You need to login to AWS IoT for further deployment procedure, which will be described in my next blog.
Thanks!!
Check out some more blogs:
- Configuring AWS Greengrass Core on VMware vSphere
- VNF Manager vs NFV Orchestrator (VNFM vs NFVO)
- Network Functions Virtualization (NFV)
- What is Hyper-Threading ?
- Installing VMware Workstation on Windows
- Virtual Networking in VMware Workstation
If you like my blogs Please Share…

